
In the beginning
Before diving into anything barely practical, we need to start with the basics. The go-to basic embedded project is the blinking LED, but I don’t like something so simple. Instead, my first project will be a LED blinking device that uses two buttons to select a power blink level while pressed.
The idea is simple enough for a first thing, but let’s see how it works.

The circuit is very simple. Just a button with a pull-down 10k resistor, a led using a 330 resistor. Everything mounted on a cheap protoboard.
The Arduino Uno R3 in the picture is using this driver code to run:
/********************************/
/*  Blink LED with two levels   */
/*  Talkys Assis 2025-04-19     */
/********************************/

#define INPUT_LOW 2
#define INPUT_HIGH 4
#define OUTPUT_PIN 3

void setup()
{
	pinMode(INPUT_LOW, INPUT);
  	pinMode(INPUT_HIGH, INPUT);
  	pinMode(OUTPUT_PIN, OUTPUT);
}

void loop()
{
    // Just a simple if combo to read the inputs
    // Those 3 states just set HIGH, LOW and OFF
    if(digitalRead(INPUT_LOW) == 1)       analogWrite(OUTPUT_PIN, 20);
    else if(digitalRead(INPUT_HIGH) == 1) analogWrite(OUTPUT_PIN, 200);
    else analogWrite(OUTPUT_PIN, 0);


    delay(200);
    analogWrite(OUTPUT_PIN, 0);
    delay(200);
}
Simple enough — now let’s see it in action.
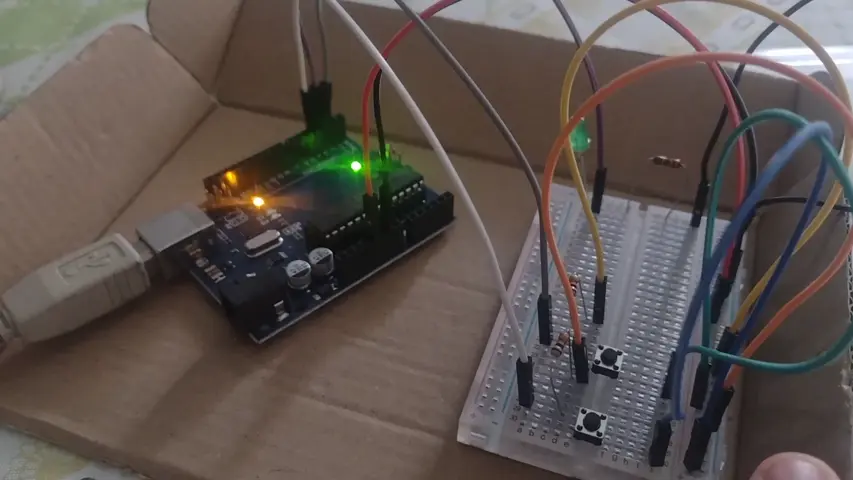
And it works!
This was a solid start. I’ll try out a few more beginner-friendly projects before jumping into something more complex.
— Talkys